
Social media has changed the world in ways we couldn’t have imagined even 10 years ago. Nowadays, many people use social media to communicate with clients and potential customers via websites like Facebook, Twitter, and Pinterest, as well as directly through their own personal websites or blogs. To take your website or blog one step further and make it truly interactive, follow these simple steps to add Facebook Messenger chat to your WordPress website
Related: How to Create a WordPress Website from Your Mobile
Create the Chat
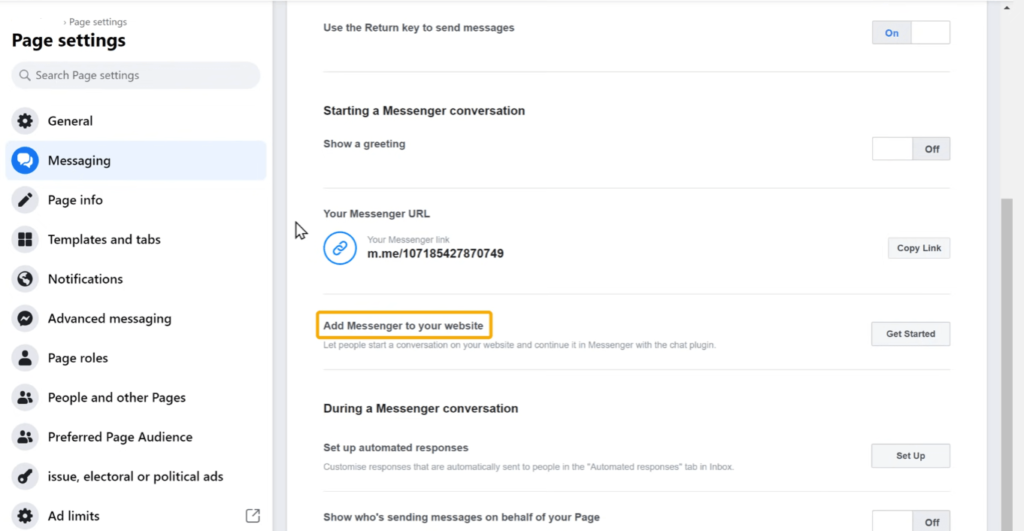
Firstly, login to your Facebook account and Create a Facebook page if you don’t have already. Then go to Page Settings > Messaging. Scroll down till you see “Add messenger to your website”. Click on Get Started next to it and then “Next”. You will see a live preview of the chat box on the next screen.
The Welcome Message is a default welcome text which appears when a visitor opens the chat. It is fully customizable for the chat plugin of Facebook.
Customizing the Facebook Chat Plugin

To edit the welcome message, click “edit” under greetings section on the left side and type whatever you wish for in that textbox. Below that, you can enable or disable “guest chat” for your website, If it is turned on, the visitor will be able to message your page without logging in to his/her Facebook account.
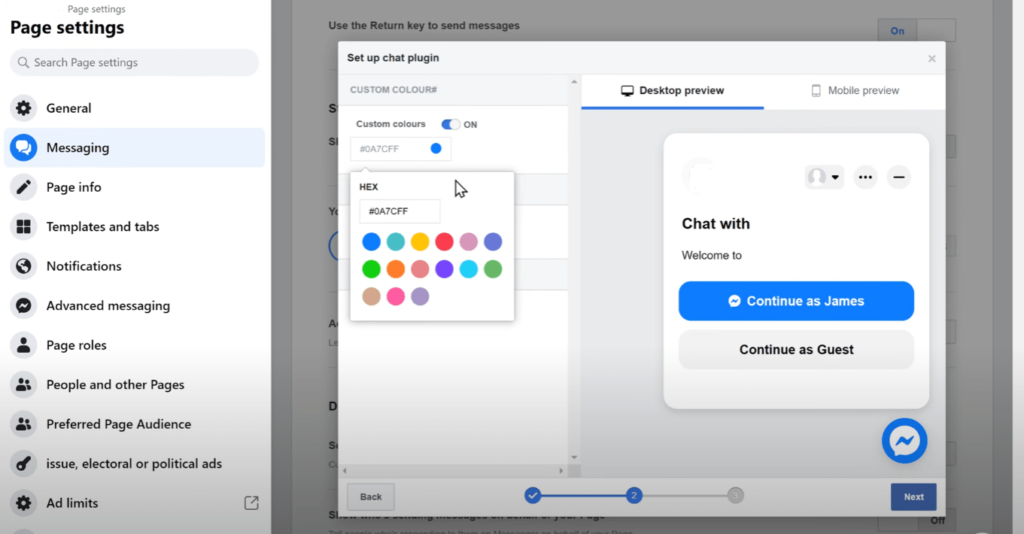
Now, if you want to change the color of your chat to match the color scheme of your website, click the button below “custom colors” and pick your preferred color from there.
Moreover, you can change the alignment of chat plugin by choosing left or right alignments below custom colors option.
I suggest you to turn on the “Automatically expand” option to encourage users to message you.
Set up Chat Plugin
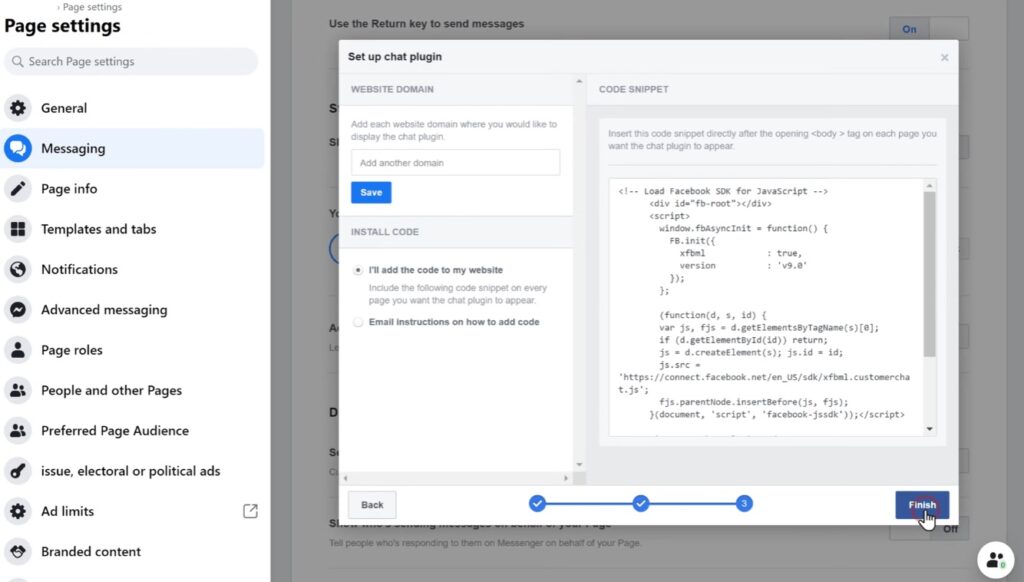
To make the plugin work, click next and add your full domain URL under “Website Domain” (eg: https://your-website.com) then click “save”. Then copy the code snippet on the right side of the box.
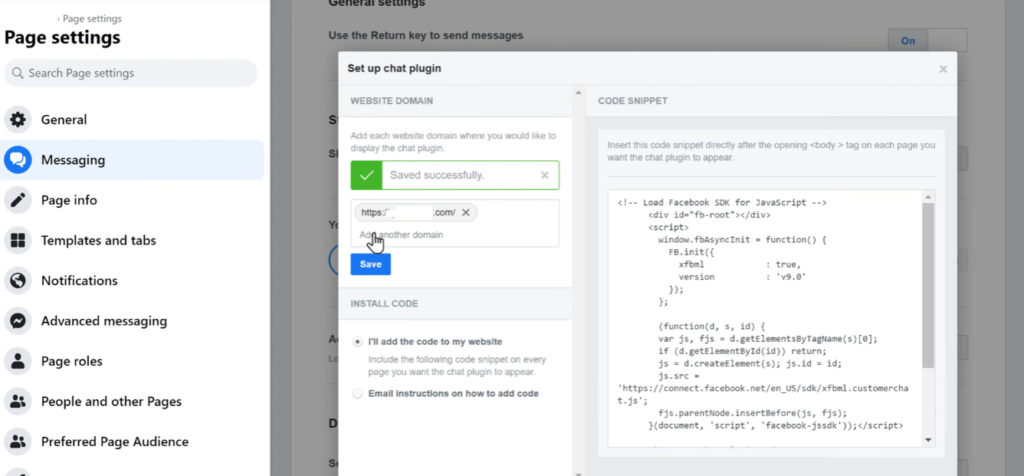
The cool thing about using code snippets is that you can either show the chat plugin globally on your website, or just place the code on specific pages on which you want to show the Facebook chat plugin.
Add the Chat to your WordPress Website
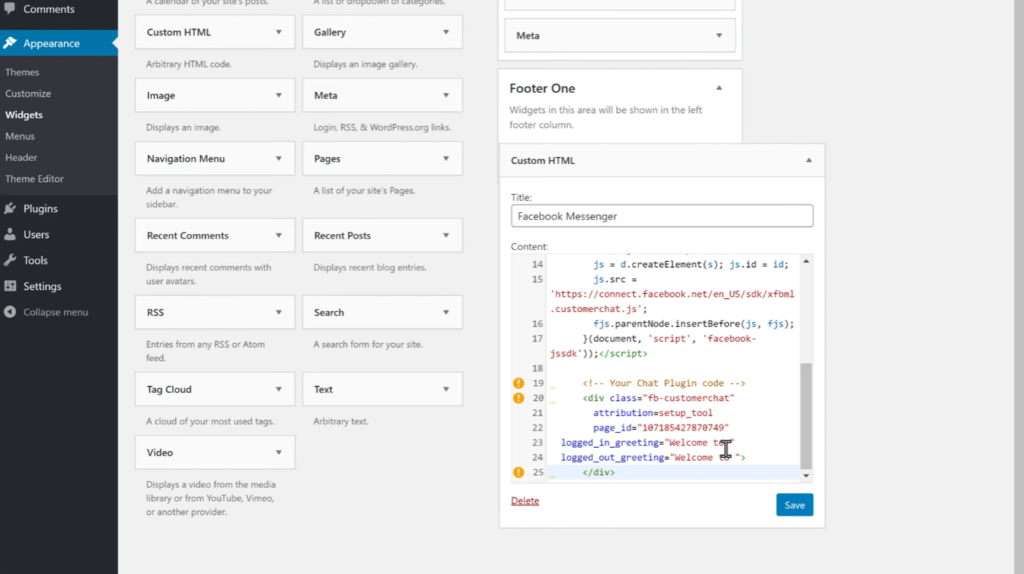
Head over to your WordPress Dashboard and click on Appearance > Widgets. Here, add a “custom HTML” widget to the footer area as shown in the image.
Name the widget and paste the code snippet you copied from your Facebook chat plugin. Save the changes and that’s it! You have successfully integrated Facebook Chat Plugin on your website.
How to reply to the Messages sent from the Chat Plugin
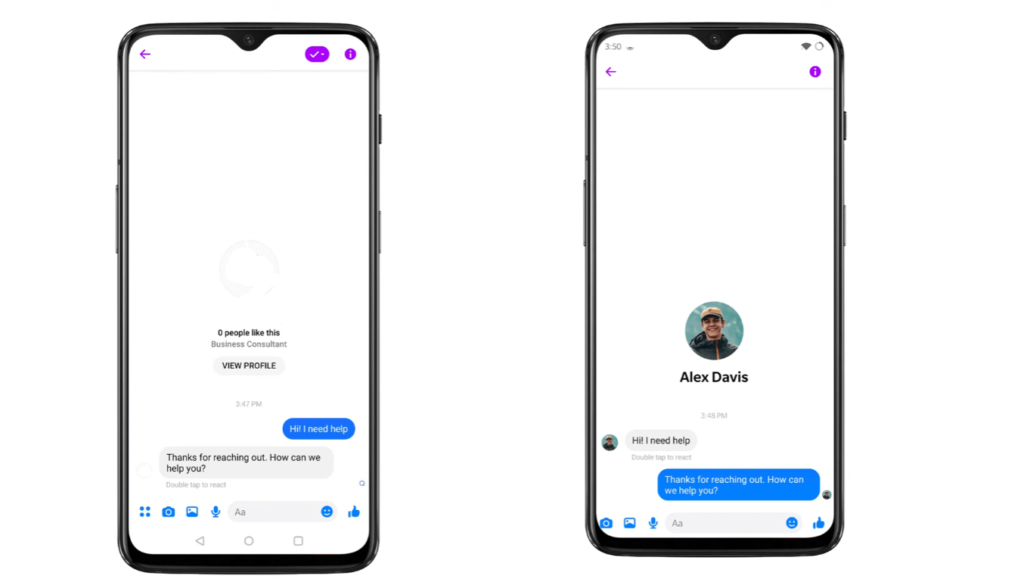
When a user from your website contacts you as a guest or a logged in user, you will receive a Facebook chat notification on your Facebook page. However, you need to be logged into your account in order to receive the notification. Once, you receive the notification, open the chat and reply to them as you normally would to a conversation. The response will be send directly on your website to the sender.
If the user decides to leave the website and message you directly on Facebook, the chat will be securely stored in their messenger as well as yours. On the other hand, if the user sends the message as a guest, you will not be able to track their profile or contact them later on.


Pingback: Buy Prazosin 5mg, 2.5mg - Best Prices 2023